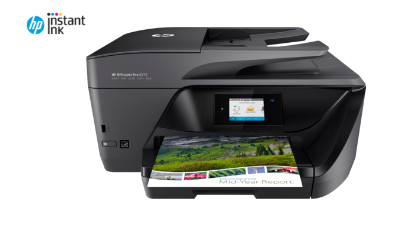
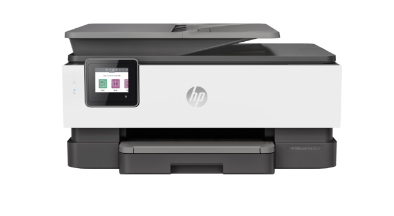
Set Up Your HP OfficeJet Pro 9125e Printer | A Comprehensive Guide
Setting up your HP OfficeJet Pro 9125e Printer is a straightforward process that ensures you get the most out of your device. This guide will walk you through each step, from unboxing to printing your first document. Whether you’re a tech novice or an experienced user, this detailed tutorial will help you set up your printer quickly and efficiently.
Table of Contents
ToggleSet Up Your HP OfficeJet Pro 9125e Printer:
Unboxing HP OfficeJet Pro 9125e Printer
Carefully open the box and remove the printer and all included accessories. These should include:
- HP OfficeJet Pro 9125e All-in-One Printer
- Power cord
- Ink cartridges (Black, Cyan, Magenta, Yellow)
- User manual and setup guide
- Software CD (if included)
Remove all packing tape and protective materials from the printer. Be sure to check inside the scanner lid and paper trays.
Setting Up the Printer Hardware
- Plug the power cord into the back of the printer and the other end into a power outlet. Press the power button to turn on the printer.
- Open the ink cartridge access door. Wait for the cartridge carriage to move to the center. Unpack the ink cartridges and insert them into their corresponding slots. Close the access door.
- Pull out the paper input tray and load a stack of plain white paper. Adjust the paper width guides so they fit snugly against the edges of the paper.
Initial Printer Setup
- On the printer’s control panel, select your language, country/region, and other preferences. Follow the on-screen instructions to complete the setup.
- The printer will automatically prompt you to print an alignment page. Follow the instructions to complete the alignment process.
Connecting Your Printer to a Network
- On the printer’s control panel, navigate to the Wireless Setup Wizard. Select your Wi-Fi network from the list and enter your Wi-Fi password.
- If you prefer a wired connection, connect an Ethernet cable to the printer and your router.
Installing Printer Software
- Visit the HP support website and search for the HP OfficeJet Pro 9125e. Download the latest drivers and software for your operating system.
- Run the downloaded software and follow the on-screen instructions to install the printer drivers and utility software.
- During the software installation, you will be prompted to connect the printer to your network. Follow the instructions to complete the connection.
Printing a Test Page
- Open any document on your computer.
- Go to the print dialog and select “HP OfficeJet Pro 9125e” as your printer.
- Click on “Print” to print your document.
Mobile Printing Setup
- Download the HP Smart app from the App Store (iOS) or Google Play (Android).
- Open the app, tap on the plus sign (+) to add a new printer. Follow the instructions to connect your printer to the app.
- You can now print photos, documents, and more directly from your mobile device.
How to Scan to Computer with HP OfficeJet Pro 9125e Printer
The HP OfficeJet Pro 9125e All-in-One Printer is a versatile device that not only prints but also scans and copies efficiently. Scanning documents to your computer is a convenient way to digitize important papers.
Step 1: Prepare Your Document
- Open the scanner lid.
- Place your document face down on the scanner glass. Align it with the guides on the edges of the glass.
- Close the scanner lid.
- If you are scanning multiple pages, you can use the ADF.
- Place the stack of documents face up in the ADF tray.
- Adjust the paper width guides to fit the documents snugly.
Step 2: Initiate the Scan from the Printer
- On the printer’s control panel, tap the Scan icon.
- Select Computer as the destination.
- Choose the computer you want to scan to (if you have multiple computers connected).
- Select the type of scan (e.g., Document, Photo).
- Adjust the scan settings (e.g., resolution, color) as needed.
- Tap Start Scan.
Step 3: Initiate the Scan from Your Computer
- Open the HP Smart app on your computer.
- Click on the Scan tile.
- Choose Scanner as the source.
- Adjust the scan settings such as page size, color, and resolution.
- Click Scan to start the scanning process.
Tips for Better Scanning
- Ensure the scanner glass is clean to avoid smudges or spots on the scanned image.
- Properly align documents to avoid crooked scans.
- Experiment with different resolution and color settings to get the best scan quality.
How to Enroll Your HP OfficeJet Pro 9125e Printer in HP Instant Ink:
HP Instant Ink is a convenient subscription service that automatically delivers ink to your door when your printer runs low. Enrolling your HP OfficeJet Pro 9125e in HP Instant Ink can save you time and money while ensuring you never run out of ink. Follow this step-by-step guide to enroll your printer in the HP Instant Ink program..
Step-by-Step Enrollment Instructions
Open a web browser on your computer or mobile device.
Go to the HP Instant Ink website.
If you already have an HP account, click Sign In and enter your credentials.
If you don’t have an account, click Sign Up and follow the instructions to create one.
After signing in, click on Enroll or Get Started to begin the enrollment process.
Enter the printer code or select your printer model (HP OfficeJet Pro 9125e) from the list.
Follow the on-screen instructions to connect your printer to the HP Instant Ink service.
HP Instant Ink offers several plans based on your monthly page usage. Choose a plan that best fits your printing needs.
Plans typically range from occasional printing (50 pages per month) to frequent printing (700 pages per month).
Each plan includes a set number of pages, with additional pages available for a small fee.
Review the details and costs associated with each plan.
Provide the address where you want your Instant Ink cartridges delivered.
Enter your payment information. HP Instant Ink requires a valid credit card or debit card for the subscription.
Review all your details, including the plan, shipping address, and payment information.
Click Complete Enrollment or Finish to finalize the process.
Your printer will automatically connect to the HP Instant Ink service and update its status.
You will receive a welcome kit with HP Instant Ink cartridges in the mail. These cartridges are different from regular cartridges and are required for the service to work.
Now you have your printer ready to handle all your printing, scanning, and copying needs in no time. Enjoy the convenience and high-quality performance of your new HP printer!
For any troubleshooting or further assistance, refer to the user manual or visit the HP support website. Happy printing!
Related Articles:
How to Scan to Computer with HP Printer: A Step-by-Step Guide